Setting up a room or equipment mailbox in Microsoft Exchange or Microsoft 365 can present a few common challenges, particularly around permissions, booking policies, and visibility in the organization’s calendar. Below are typical problems encountered and how to resolve them.
We would also be looking at the major problems around setting upTeams meeting rooms and equipment and how to resolve them using
- Using Graphical User Interface
- PowerShell Scripting
Step-by-Step Solutions Using GUI-Based Tools:
1. Making the Mailbox Visible in the Global Address List (GAL)
Exchange Admin Center (EAC)
- Log into the Exchange Admin Center.
- Navigate to Recipients > Resources.
- Locate the room or equipment mailbox in the list.
- Click on the mailbox to open its properties.
- Go to the General tab and ensure that Hide from address lists is unchecked.
- Click Save to apply the changes.
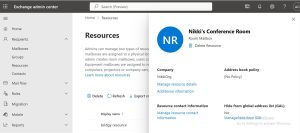
Exchange Admin Center Room Mailbox General properties
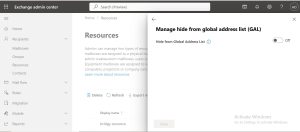
Exchange Admin Center Room Mailbox General properties – Global Address List turned off
2. Configuring Booking Policies and Restrictions
Exchange Admin Center
- Log into Exchange Admin Center.
- Navigate to Recipients > Resources and select the room or equipment mailbox.
- Click on Mailbox features or Booking options.
- Adjust settings such as:
- Maximum booking duration: Set the maximum time the room can be booked.
- Allow repeating meetings: Enable or disable recurring meetings.
- Booking permissions: Choose whether only specific users can book the resource or if it’s open for all.
- Click Save to confirm the changes.
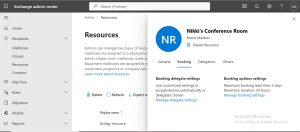
Exchange Admin Center Room Mailbox Booking properties
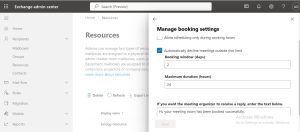
Exchange Admin Center Room Mailbox Booking properties – Booking option setting
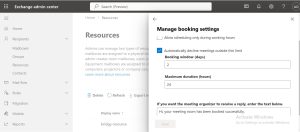
Exchange Admin Center Room Mailbox Booking properties – Booking delegate setting
Microsoft 365 Admin Center
- Log into Microsoft 365 Admin Center.
- Navigate to Resources, select the desired room or equipment mailbox.
- Adjust Booking policy options as required.
- Save the settings.
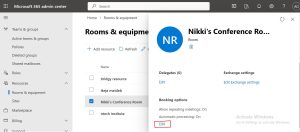
M365 Admin Center Room Mailbox Booking properties
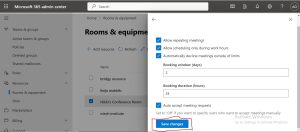
M365 Admin Center Room Mailbox Booking properties
3. Enabling Automatic Booking (Auto-Accept)
Exchange Admin Center
- Log into Exchange Admin Center.
- Navigate to Recipients > Resources.
- Select the mailbox and go to Booking options.
- Enable Automatically accept or decline booking requests to ensure auto-acceptance of bookings.
- Click Save to apply changes.
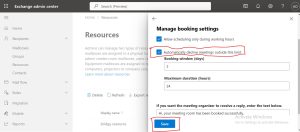
Exchange Admin Center Room Mailbox Booking properties – Automatic message setting
4. Managing Permissions for Room/Equipment Booking
Exchange Admin Center
- Log into Exchange Admin Center.
- Navigate to Recipients > Resources and select the mailbox.
- Click on Mailbox delegation or Permissions.
- Add users or groups to assign Full Access, Send As, or Send on Behalf permissions.
- Confirm the permissions by clicking Save.
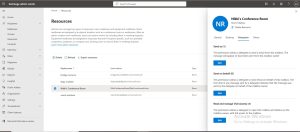
Exchange Admin Center Room Mailbox Booking properties – Delegation setting
Microsoft 365 Admin Center
- Log into Microsoft 365 Admin Center.
- Go to Resources > Rooms & Equipments, select the mailbox, and click on Delegate.
- Add or update members and set their access rights.
- Save the changes.
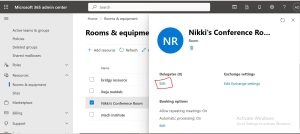
M365 Admin Center Room Mailbox Delegate setting
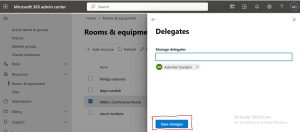
M365 Admin Center Room Mailbox Delegate setting – Adding Members
Conclusion: This comprehensive breakdown of each step ensures that administrators can use graphical interfaces within Exchange Admin Center, and Microsoft 365 Admin Center to effectively manage and resolve common issues with room and equipment mailboxes without the need for scripting.
Method 2: Resolving Issues Using PowerShell
- Making the Mailbox Visible in the Global Address List (GAL)
Run the following command to ensure the mailbox is visible:
Set-Mailbox -Identity “NikkiConferenceRoom@tse3.onmicrosoft.com” -HiddenFromAddressListsEnabled $false
2. Configuring Booking Policies and Restrictions
Use PowerShell to set booking policies:
Set-CalendarProcessing -Identity “NikkiConferenceRoom@tse3.onmicrosoft.com” -EnforceSchedulingHorizon $true -MaximumDurationInMinutes 180
3. Enabling Automatic Booking (Auto-Accept)
Run the following command to automate booking acceptance:
Set-CalendarProcessing -Identity “NikkiConferenceRoom@tse3.onmicrosoft.com” -AutomateProcessing AutoAccept
4. Assigning Permissions for Booking and Management
Grant permissions with this command:
Add-MailboxPermission -Identity “NikkiConferenceRoom@tse3.onmicrosoft.com” -User “Adenike Oyelakin” -AccessRights FullAccess
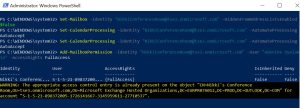
Conclusion: Administrators have two main approaches for managing room and equipment mailboxes: GUI-based tools for ease of use and PowerShell for more advanced control. Choose the method that best suits your organization’s needs for effective mailbox management.
Detailed Step-by-Step Guide for Teams Meeting Room Equipment
Setting up Teams meeting room equipment can come with various challenges, particularly around audio/visual issues, device connectivity, and room configuration. Below are some common problems and their solutions.
1. Audio Issues (Echo, Feedback, Low Volume, or No Sound)
- Problem: Poor sound quality can result from microphone placement, room acoustics, or incompatible audio devices.
- Solution:
- Position microphones and speakers to avoid echo or feedback. Place the mic away from speakers.
- Adjust Teams audio settings by selecting Devices > Audio in the Teams Room console to choose the correct microphone and speakers.
- If the room’s acoustics are poor, install sound-absorbing panels or ensure carpeted floors to reduce echo.
2. Camera Issues (Poor Quality or Camera Not Detected)
- Problem: The camera may not connect, may be out of focus, or may capture a poor image due to lighting issues.
- Solution:
- Ensure the camera is plugged into the correct port and recognized by the device.
- Update the camera driver or firmware from the manufacturer’s website if needed.
- If lighting is the issue, use adjustable lighting to reduce glare and shadows for better video quality.
3. Device Connectivity Problems (Bluetooth, USB, or HDMI Issues)
- Problem: Devices may not connect properly due to port issues, outdated drivers, or incorrect input/output selections.
- Solution:
- Check all connections and ensure devices are properly plugged in.
- Use certified HDMI or USB cables and try different ports if one fails.
- In Teams, go to Settings > Devices to verify selected input/output devices.
4. Display Issues (No Display or Poor Screen Resolution)
- Problem: The display might not turn on, or the screen resolution may be incorrect, impacting visibility.
- Solution:
- Verify HDMI connections between the computer and display.
- Use the correct display settings for Teams Rooms by selecting Settings > Display > Resolution in the Teams app.
- Update display drivers if resolution issues persist.
5. Device Syncing and Software Compatibility
- Problem:Teams Rooms software or firmware versions may not be up to date, leading to compatibility issues with peripherals.
- Solution:
- Regularly update the Teams Room software and ensure all connected devices are on compatible firmware versions.
- Set up auto-updates if possible, so all components are consistently updated.
By addressing these key setup challenges, you can ensure a smoother experience for users and better overall functionality in your Teams meeting rooms.